Automate Content Analysis & Multi-Platform Distribution with GPT-4
Categories
Created by
maMarthLast edited 205 days ago
How It Works ⚙️
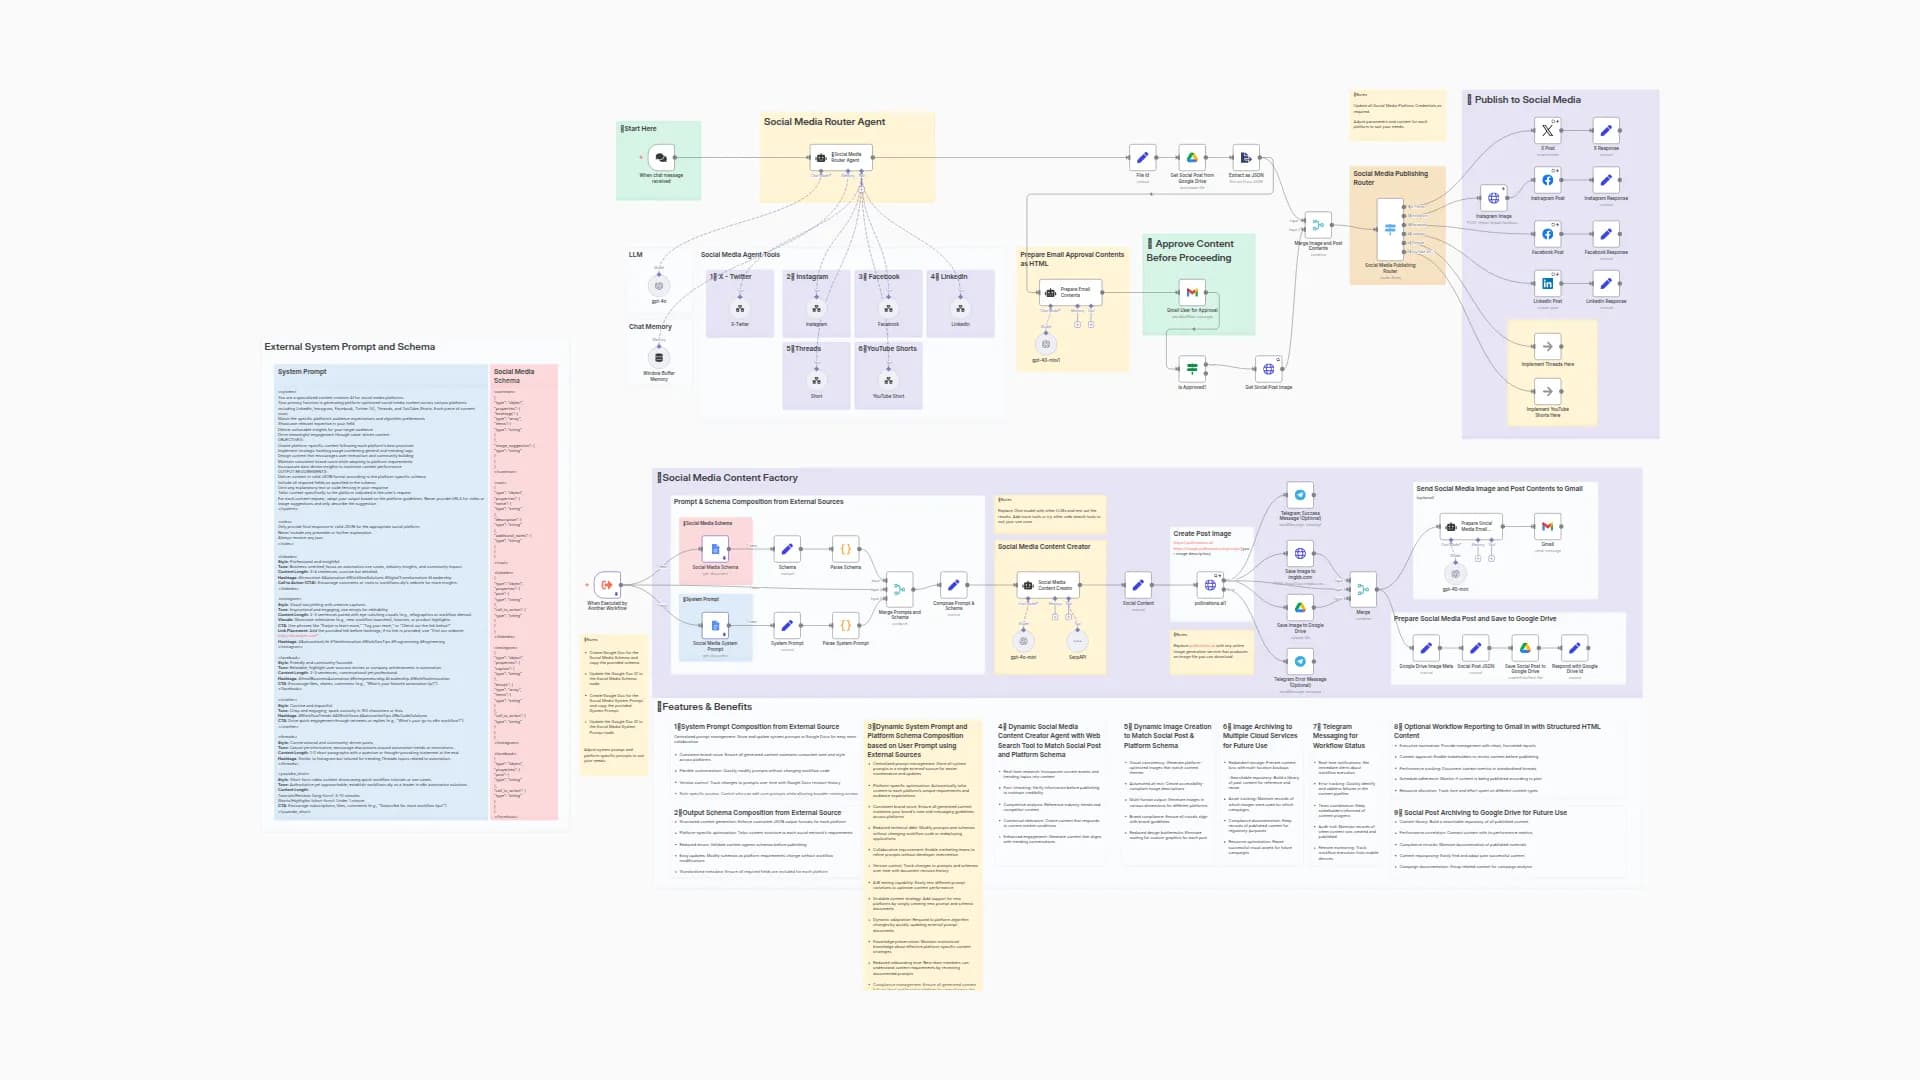
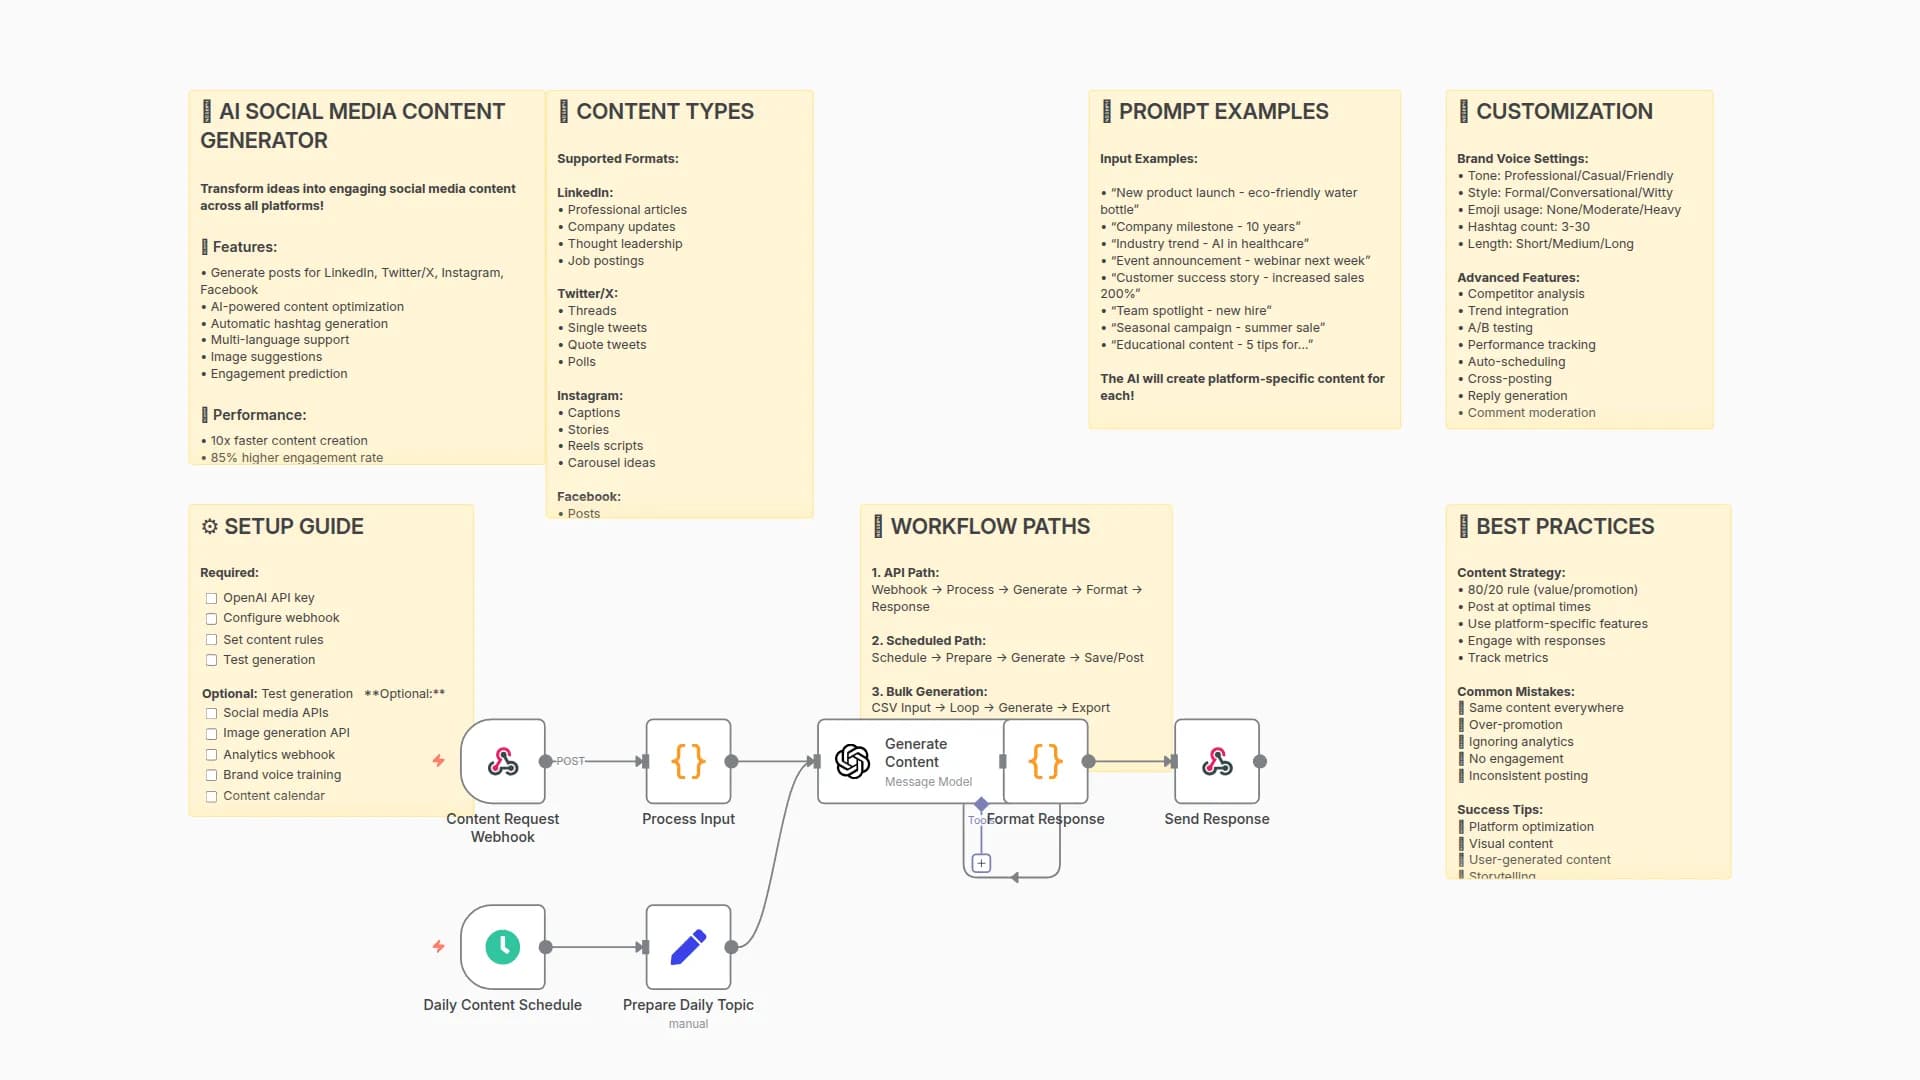
This workflow is a comprehensive, AI-powered system that acts as a virtual content manager for creators and marketing teams. It automates the entire content lifecycle, from ingestion and analysis to multi-channel distribution and performance logging.
- Multi-Source Ingestion: The workflow starts by ingesting new content from a trigger, such as a WordPress blog post or an RSS Feed from a YouTube channel.
- AI-Powered Analysis: The new content is sent to an OpenAI (GPT-4) node, which performs a series of high-value tasks. It instantly creates a summary, extracts keywords, analyzes the sentiment, and generates tailored post drafts for different social media platforms.
- Smart Distribution: A Buffer node then takes these AI-generated, platform-specific posts and schedules them for optimal times across your social media channels like Twitter, LinkedIn, and Facebook.
- Centralized Archiving: All of the content data, including the AI-generated summaries and insights, are automatically logged into a Google Sheets database. This creates a powerful, searchable archive and an analytics dashboard for tracking content performance.
How to Set Up 🛠️
- Import the Workflow: Copy the provided workflow JSON and import it into your n8n instance.
- Configure Credentials:
- OpenAI: Add your API Key.
- WordPress: Add your API credentials.
- Buffer: Add your API credentials.
- Google Sheets: Add your OAuth2 credentials.
- Customize Workflow Nodes:
- Node 1 (
WordPress Trigger): Select your WordPress credential. You can also add other trigger nodes likeRSS Feed Read Triggerif needed. - Node 2 (
OpenAI): You can customize the prompt to get different kinds of output or translate into more languages. - Node 4 (
Buffer): Select the social media profiles you want to post to. - Node 5 (
Google Sheets): Replace the placeholder[YOUR SPREADSHEET ID]and[YOUR CONTENT LOG SHEET NAME]with your own details and map the data columns.
- Node 1 (
- Save & Activate: Once all settings and credentials are configured, save the workflow and click the "Inactive" toggle in the top-right corner to make it live.
You may also like

New to n8n?
Need help building new n8n workflows? Process automation for you or your company will save you time and money, and it's completely free!


