Generate Images from Text with IBM Granite Vision 3.3 2B AI Model
Last edited 206 days ago
Generate Images from Text with IBM Granite Vision 3.3 2B AI Model
🌍 Overview
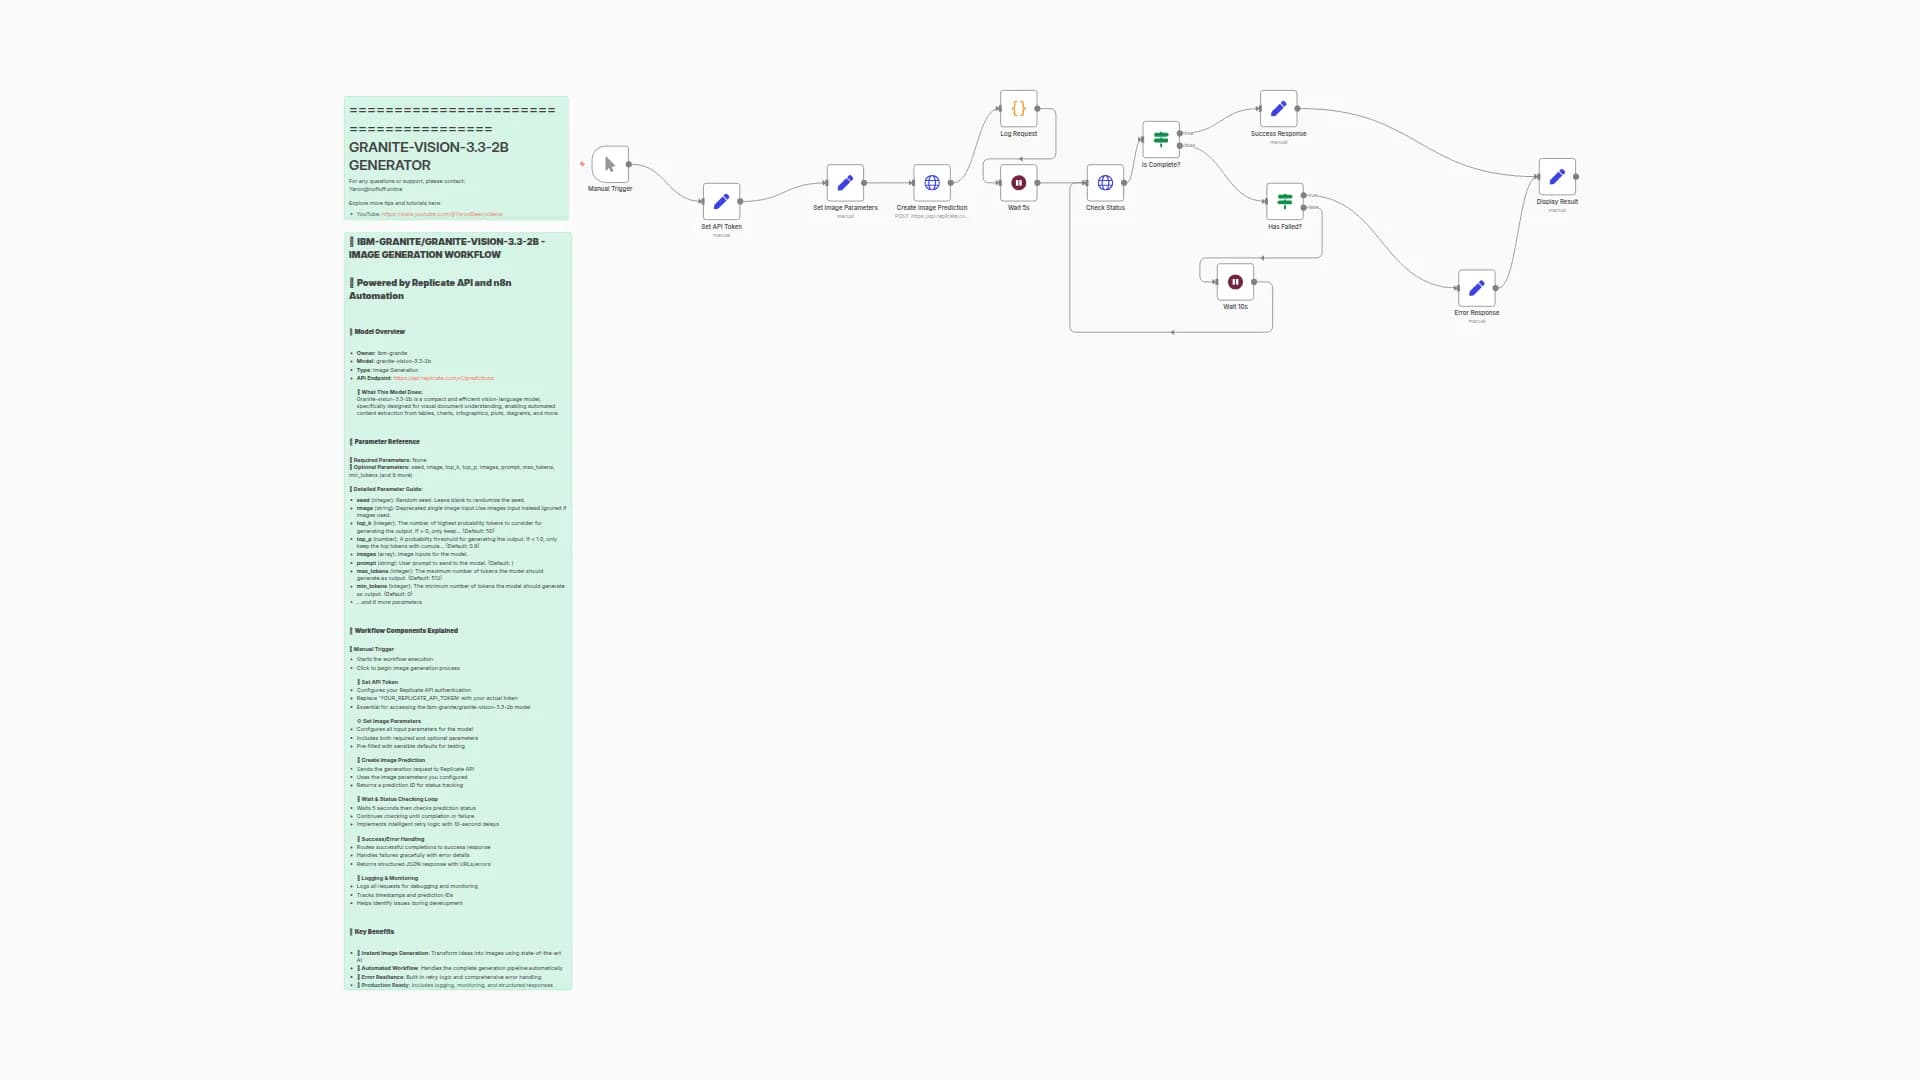
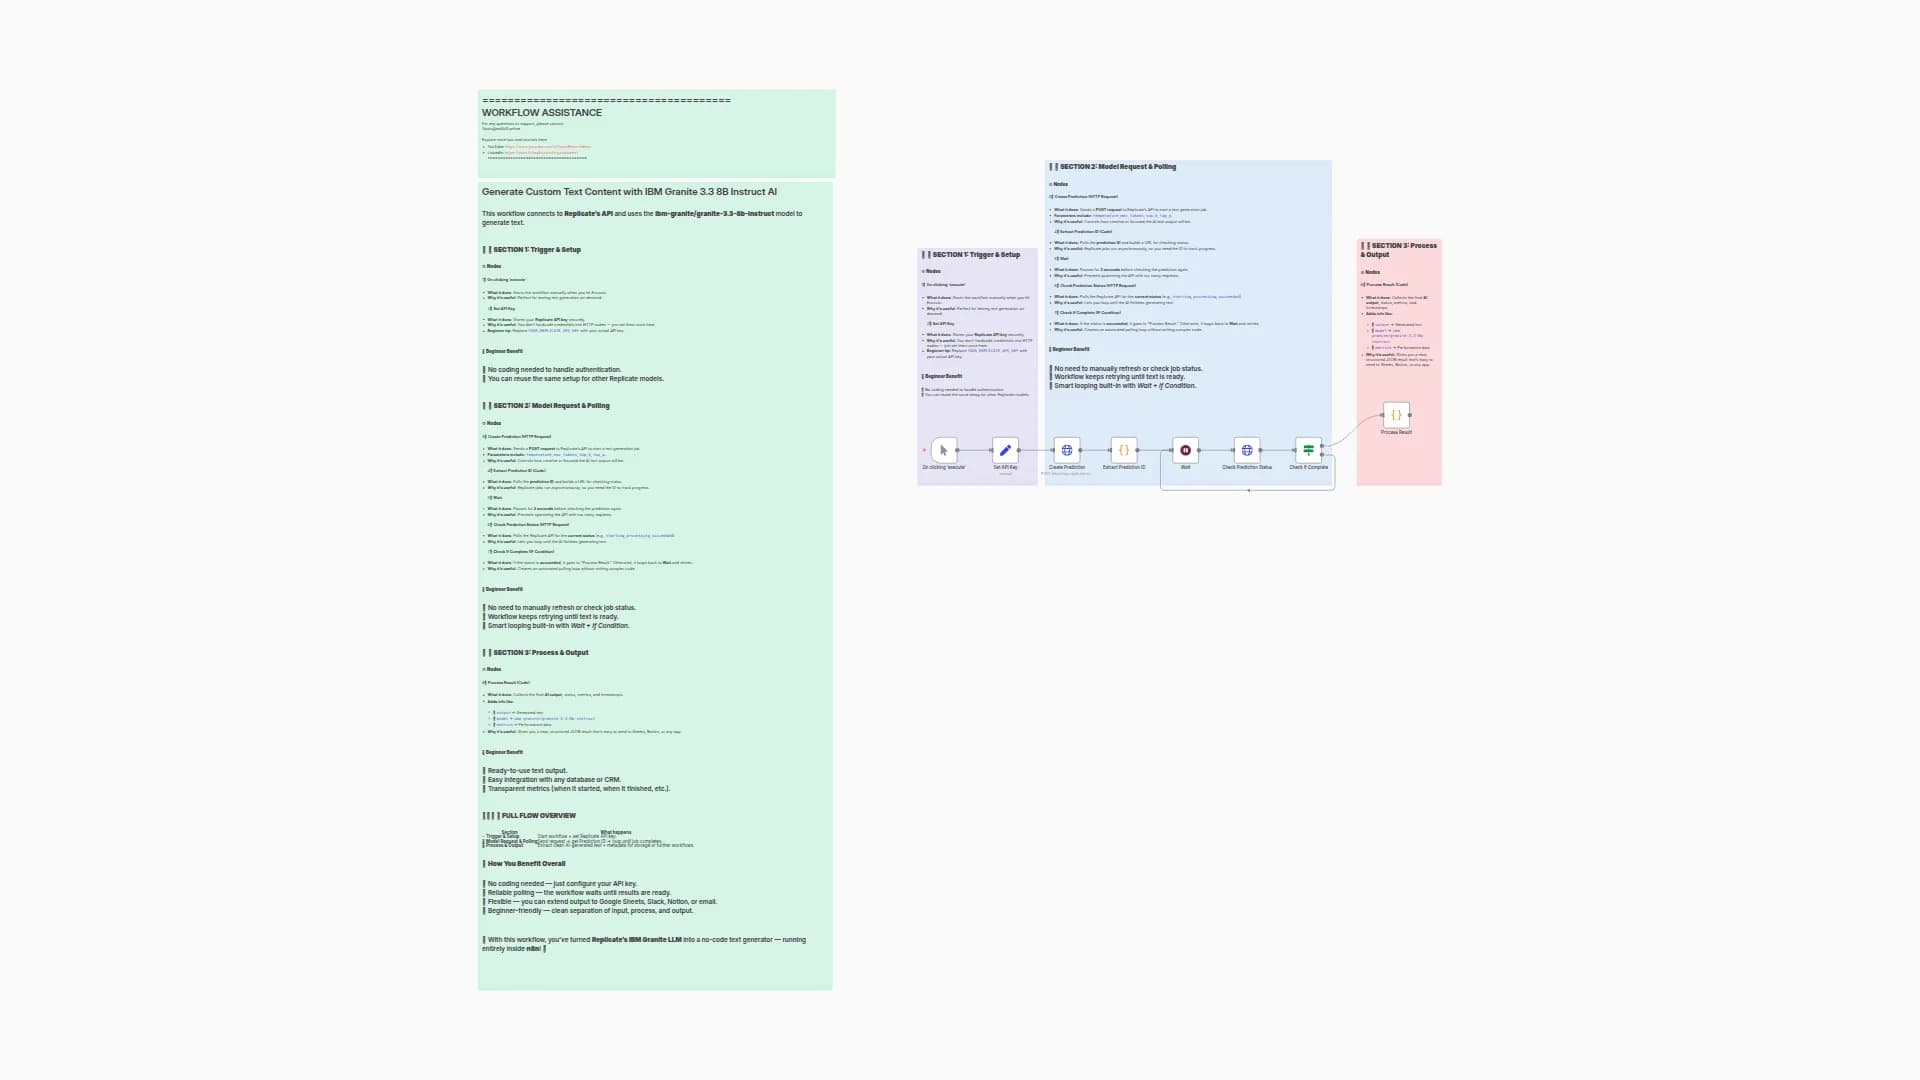
This workflow uses the ibm-granite/granite-vision-3.3-2b model (hosted on Replicate) to generate AI images. It starts manually, sends a request to the Replicate API, waits for the result, and finally outputs the generated image link.
Think of it as your AI art assistant — you click once, and it handles the full request/response cycle for image generation.
🟢 Section 1: Trigger & API Setup
🔗 Nodes:
- Manual Trigger → Starts when you click Execute.
- Set API Key → Stores your Replicate API Key safely in the workflow.
💡 Beginner takeaway:
This section is like turning the key in the ignition. You start the workflow, and it loads your credentials so you can talk to Replicate’s API.
📈 Advantage:
Keeps your API key stored inside the workflow instead of hard-coding it everywhere.
🟦 Section 2: Create Prediction
🔗 Nodes:
- HTTP Request (Create Prediction) → Sends a request to Replicate with the chosen model (
granite-vision-3.3-2b) and input parameters (seed, temperature, max_tokens, etc.).
💡 Beginner takeaway:
This is where the workflow actually asks the AI model to generate an image.
📈 Advantage:
You can tweak parameters like creativity (temperature) or randomness (seed) to control results.
🟣 Section 3: Polling & Status Check
🔗 Nodes:
-
Extract Prediction ID (Code) → Saves the unique job ID.
-
Wait (2s) → Pauses before checking status.
-
Check Prediction Status (HTTP Request) → Calls Replicate to see if the image is ready.
-
If Condition (Check If Complete) →
- ✅ If
status = succeeded→ move to result - 🔄 Else → go back to Wait and check again
- ✅ If
💡 Beginner takeaway:
Since image generation takes a few seconds, this section keeps asking the AI “are you done yet?” until the image is ready.
📈 Advantage:
No need to guess — the workflow waits automatically and retries until success.
🔵 Section 4: Process Result
🔗 Nodes:
-
Process Result (Code) → Extracts the final data:
- ✅ Status
- ✅ Output image URL
- ✅ Metrics (time taken, etc.)
- ✅ Model info
💡 Beginner takeaway:
This section collects the finished image link and prepares it neatly for you.
📈 Advantage:
You get structured output that you can save, display, or use in another workflow (like auto-sending images to Slack or saving to Google Drive).
📊 Final Overview Table
Section
Nodes
Purpose
Benefit
🟢 Trigger & Setup
Manual Trigger, Set API Key
Start + load credentials
Secure API key management
🟦 Create Prediction
HTTP Request
Ask AI to generate image
Control creativity & output
🟣 Polling
Extract ID, Wait, Check Status, If
Repeatedly check job status
Auto-wait until done
🔵 Process Result
Process Result
Extract image + details
Get clean output for reuse
🚀 Why This Workflow is Useful
- Automates full API cycle → From request to final image URL
- Handles delays automatically → Keeps checking until your image is ready
- Customizable parameters → Adjust creativity, randomness, and token limits
- Reusable → Connect it to email, Slack, Notion, or storage for instant sharing
- Beginner-friendly → Just plug in your API key and hit Execute
You may also like
New to n8n?
Need help building new n8n workflows? Process automation for you or your company will save you time and money, and it's completely free!


