Generate PDF Invoices from Google Sheets with PDF.co
Last edited 206 days ago
This workflow automatically pulls invoice rows from Google Sheets and generates a PDF invoice using a PDF.co template.
Perfect for small businesses that manage invoices in Sheets but need professional, ready-to-send PDFs.
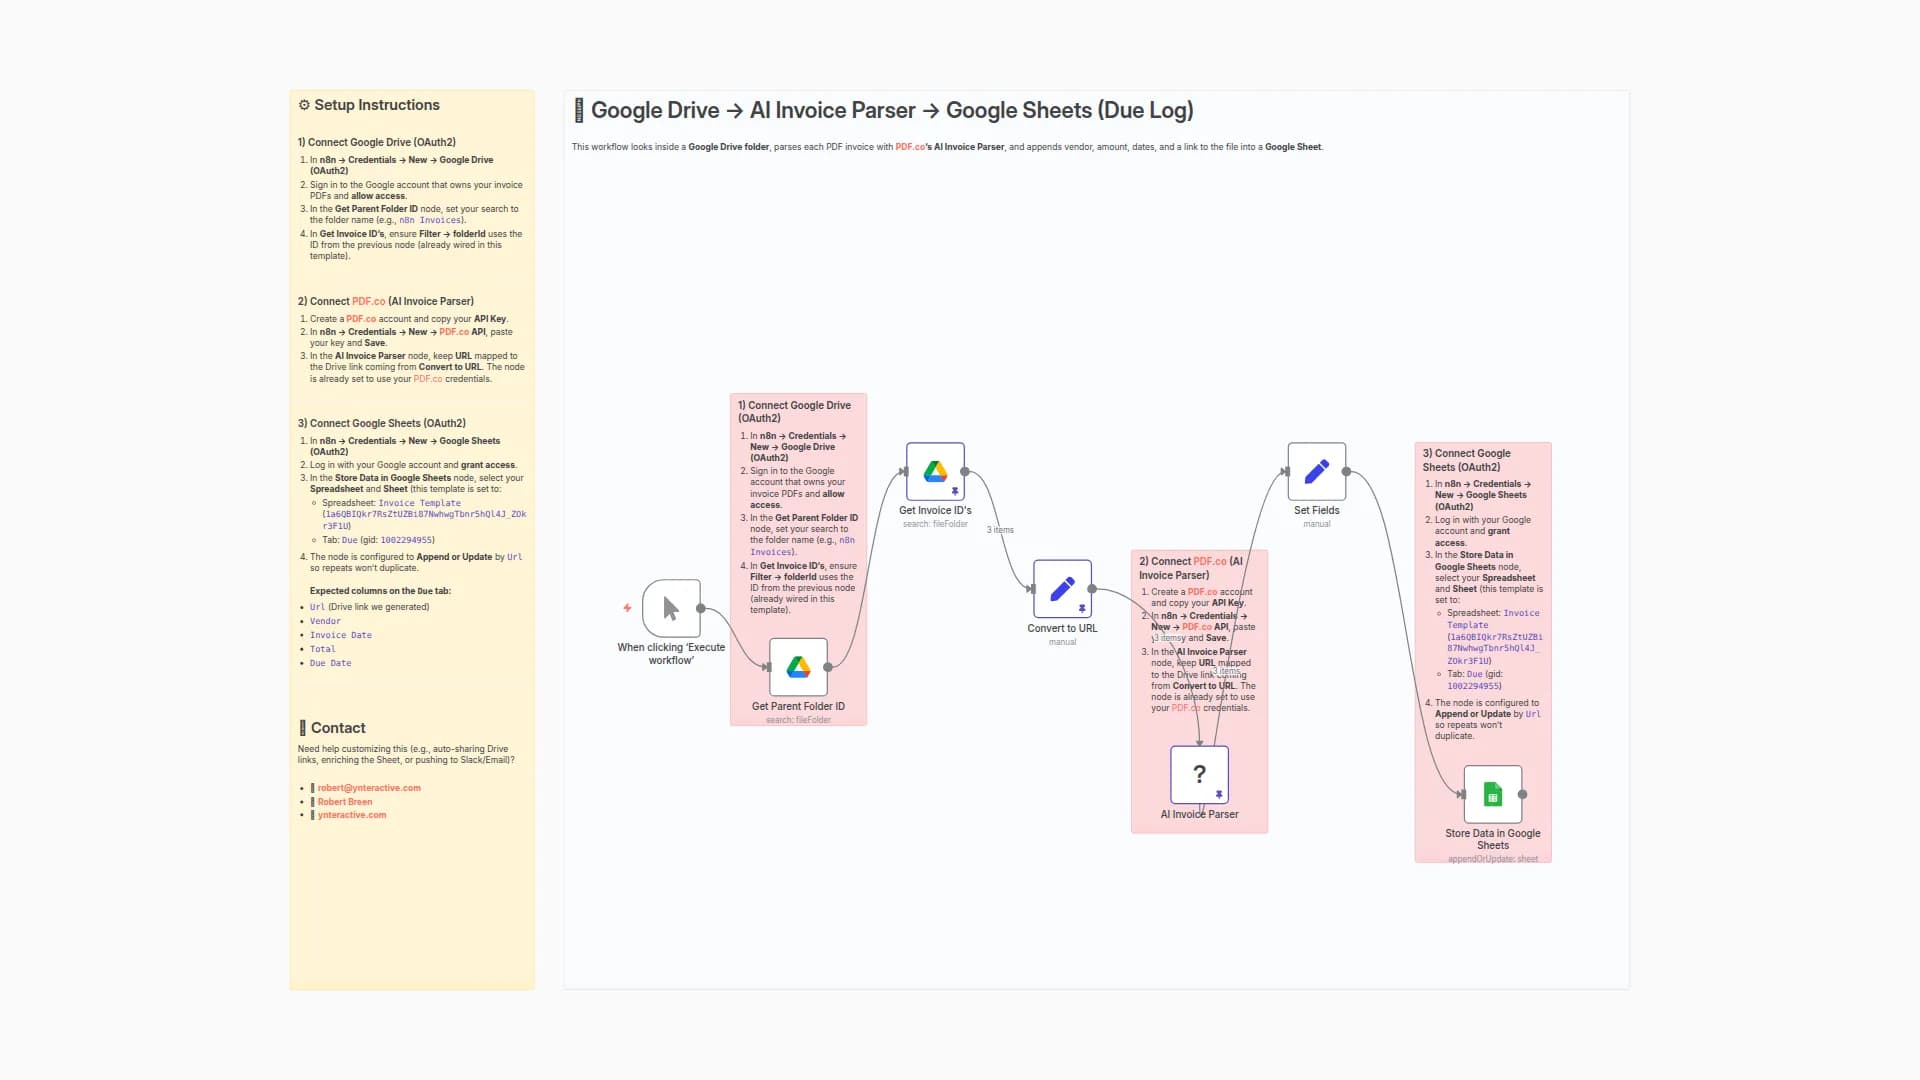
⚙️ Setup Instructions
1️⃣ Connect Google Sheets
- Copy this Invoice Template Sheet into your own Drive
- In n8n → Credentials → New → Google Sheets (OAuth2)
- Log in with your Google account and save
- In the workflow, select your Spreadsheet ID and Worksheet (Sheet1) in the Google Sheets node
2️⃣ Connect PDF.co
- Create a free account at PDF.co
- Copy your API Key from the dashboard
- In n8n → Credentials → New → PDF.co API
- Paste your API Key → Save
- In the PDF.co node, select your credential and choose the HTML Template to PDF operation
3️⃣ Create Your PDF.co HTML Template
- In your PDF.co dashboard, go to Templates → New Template
- Paste in the HTML from the template section below
- Save the template and copy its Template ID
- Replace the
templateIdin the workflow with your new ID
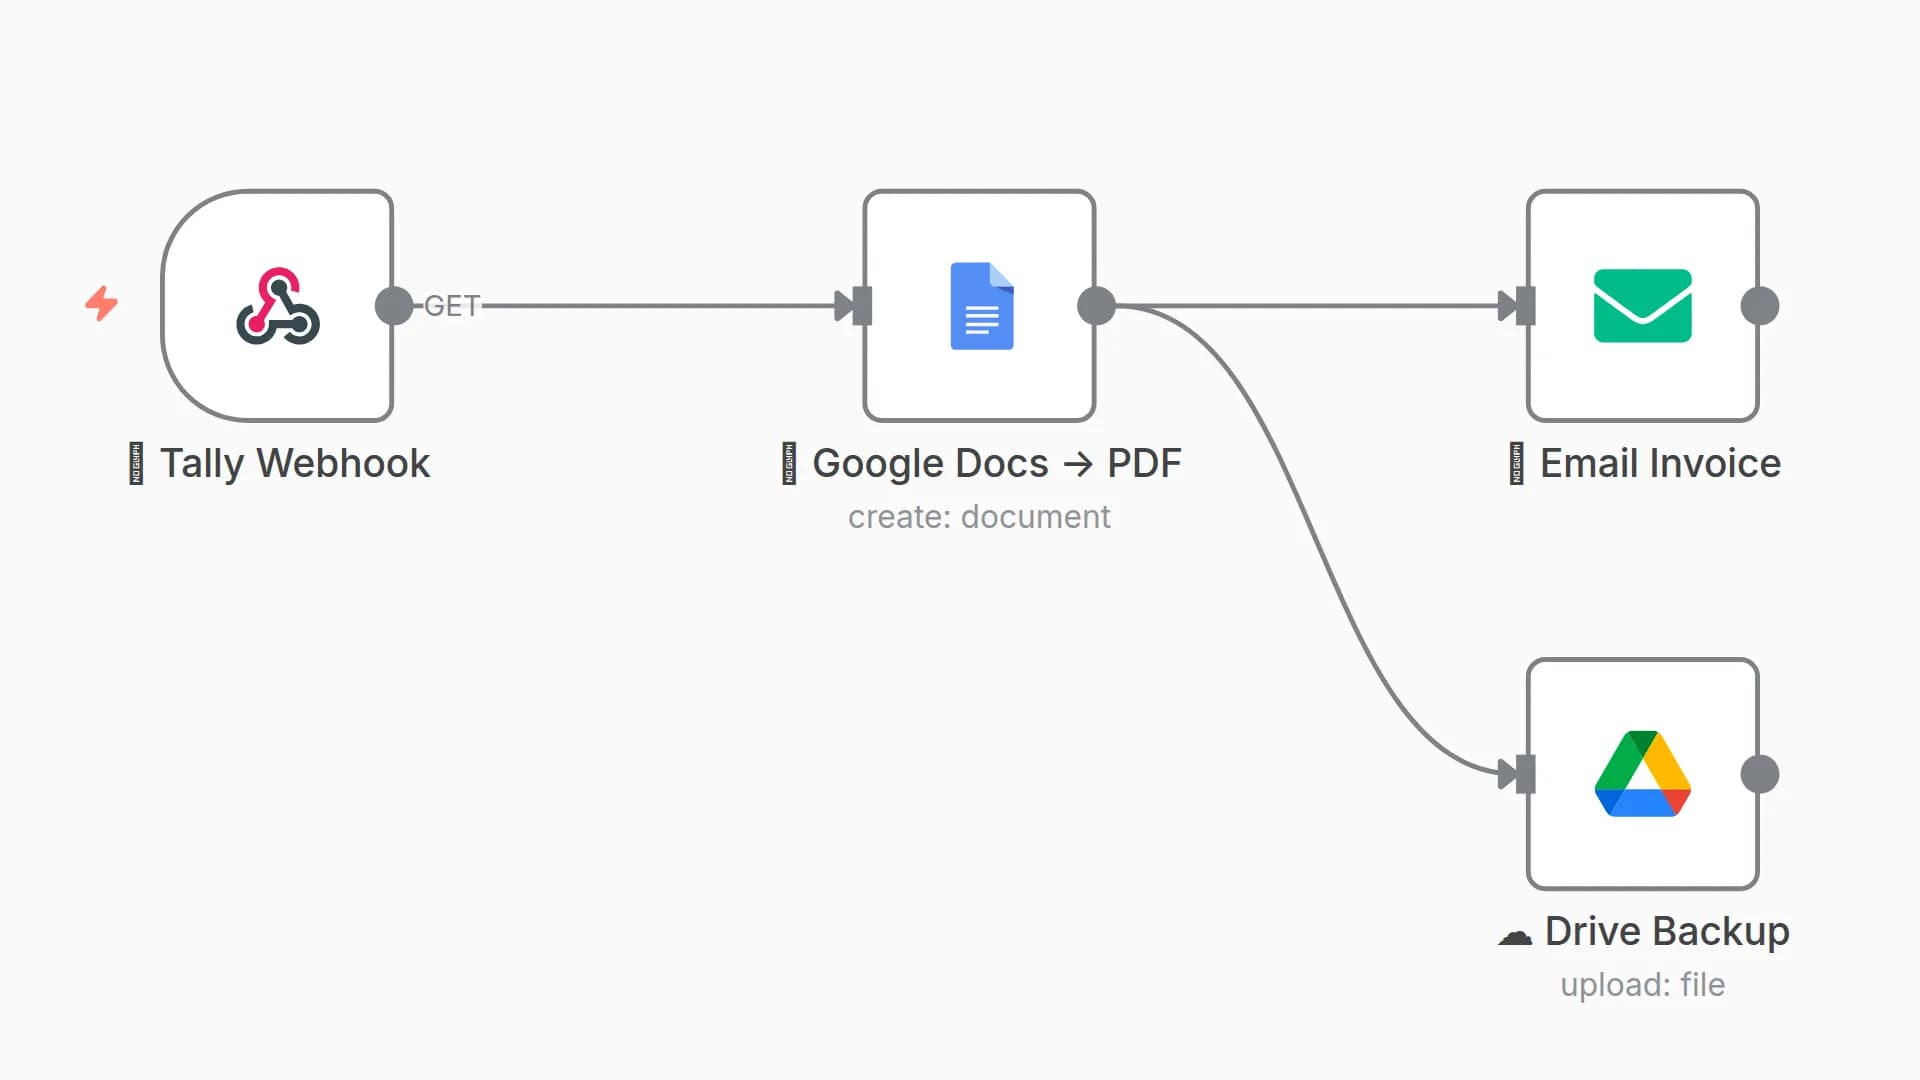
🧠 How It Works
- Get Invoice Rows → Reads your Google Sheet rows (customer, line items, totals)
- Convert to HTML Import (Code node) → Formats rows into structured data for the invoice template
- Create PDF (PDF.co) → Sends the data into PDF.co and generates a professional PDF invoice
📬 Contact
Need help customizing this (e.g., add taxes, change invoice styling, or auto-email invoices)?
📧 [email protected]
🔗 Robert Breen
🌐 ynteractive.com
📄 Full HTML Template for PDF.co
Use this HTML when creating your PDF.co template:
<!DOCTYPE html>
<html>
<head>
  <meta charset="utf-8" />
  <title>Invoice {{invoiceNumber}}</title>
  <style>
    body { font-family: Arial, Helvetica, sans-serif; margin: 36px; color: #222; }
    .header { display: flex; justify-content: space-between; align-items: center; }
    .brand { max-height: 56px; }
    h1 { margin: 12px 0 4px; font-size: 22px; }
    .meta { font-size: 12px; color: #555; }
    .two-col { display: flex; gap: 24px; margin-top: 16px; }
    .box { flex: 1; border: 1px solid #ddd; padding: 12px; border-radius: 6px; }
    .label { font-size: 11px; color: #666; text-transform: uppercase; letter-spacing: .02em; }
    table { width: 100%; border-collapse: collapse; margin-top: 16px; }
    th, td { border-bottom: 1px solid #eee; padding: 10px 8px; font-size: 13px; }
    th { background: #fafafa; text-align: left; }
    tfoot td { border-top: 2px solid #ddd; font-size: 13px; }
    .right { text-align: right; }
    .totals td { padding: 6px 8px; }
    .grand { font-weight: 700; font-size: 14px; }
    .notes { margin-top: 18px; font-size: 12px; color: #444; }
  </style>
</head>
<body>
  <div>
    <div>
      <h1>Invoice {{invoiceNumber}}</h1>
      <div>Date: {{invoiceDate}}   |   Due: {{dueDate}}</div>
    </div>
    {{#company.logoUrl}}
    <img src alt="Logo" />
    {{/company.logoUrl}}
  </div>

  <div>
    <div>
      <div>From</div>
      <div><strong>{{company.name}}</strong></div>
      <div>{{company.address}}</div>
      <div>{{company.phone}}</div>
      <div>{{company.email}}</div>
    </div>
    <div>
      <div>Bill To</div>
      <div><strong>{{billTo.name}}</strong></div>
      <div>{{billTo.address}}</div>
      <div>{{billTo.email}}</div>
    </div>
  </div>

  <table>
    <thead>
      <tr>
        <th>#</th>
        <th>Description</th>
        <th>Qty</th>
        <th>Unit Price</th>
        <th>Line Total</th>
      </tr>
    </thead>
    <tbody>
      {{#items}}
      <tr>
        <td>{{line}}</td>
        <td>{{description}}</td>
        <td>{{qty}}</td>
        <td>{{unitPriceFmt}}</td>
        <td>{{lineTotalFmt}}</td>
      </tr>
      {{/items}}
    </tbody>
    <tfoot>
      <tr>
        <td colspan="4">Subtotal</td>
        <td>{{subTotalFmt}}</td>
      </tr>
      <tr>
        <td colspan="4">Tax ({{taxRatePct}})</td>
        <td>{{taxAmountFmt}}</td>
      </tr>
      <tr>
        <td colspan="4">Discount</td>
        <td>-{{discountFmt}}</td>
      </tr>
      <tr>
        <td colspan="4">Total</td>
        <td>{{totalFmt}}</td>
      </tr>
    </tfoot>
  </table>

  <div>
    <strong>Notes:</strong> {{notes}}<br />
    <strong>Terms:</strong> {{terms}}
  </div>
</body>
</html>
You may also like

New to n8n?
Need help building new n8n workflows? Process automation for you or your company will save you time and money, and it's completely free!


