🎓 Learn Evaluate tool. Tutorial for Beginners with Gemini and Google Sheets
Last edited 205 days ago
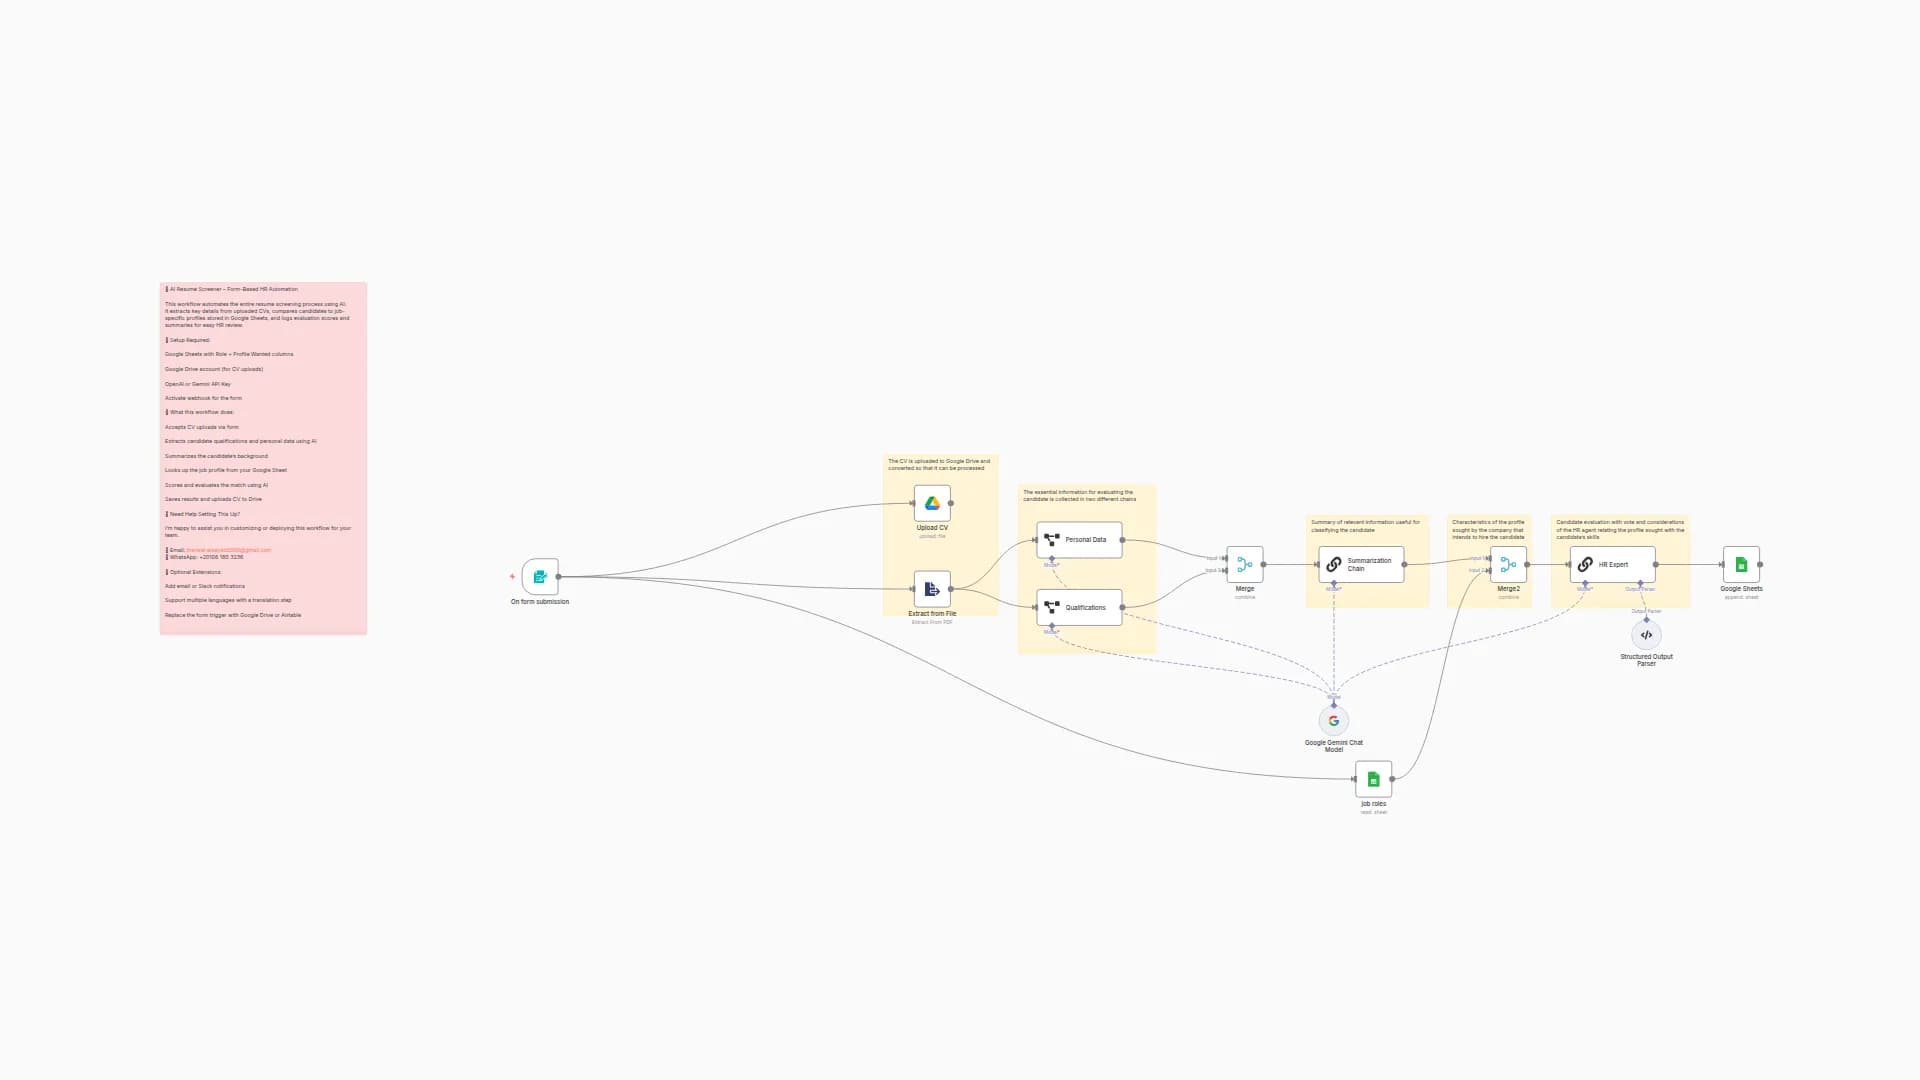
This workflow is a beginner-friendly tutorial demonstrating how to use the Evaluation tool to automatically score the AI’s output against a known correct answer (“ground truth”) stored in a Google Sheet.
Advantages
- ✅ Beginner-friendly – Provides a simple and clear structure to understand AI evaluation.
- ✅ Flexible input sources – Works with both Google Sheets datasets and manual test entries.
- ✅ Integrated with Google Gemini – Leverages a powerful AI model for text-based tasks.
- ✅ Tool usage – Demonstrates how an AI agent can call external tools (e.g., calculator) for accurate answers.
- ✅ Automated evaluation – Outputs are automatically compared against ground truth data for factual correctness.
- ✅ Scalable testing – Can handle multiple dataset rows, making it useful for structured AI model evaluation.
- ✅ Result tracking – Saves both answers and correctness scores back to Google Sheets for easy monitoring.
How it Works
The workflow operates in two distinct modes, determined by the trigger:
- Manual Test Mode: Triggered by "When clicking 'Execute workflow'". It sends a fixed question ("How much is 8 * 3?") to the AI agent and returns the answer to the user. This mode is for quick, ad-hoc testing.
- Evaluation Mode: Triggered by "When fetching a dataset row". This mode reads rows of data from a linked Google Sheet. Each row contains an
input(a question) and anexpected_output(the correct answer). It processes each row as follows:- The
inputquestion is sent to the AI Agent node. - The AI Agent, powered by a Google Gemini model and equipped with a Calculator tool, processes the question and generates an answer (
output). - The workflow then checks if it's in evaluation mode.
- Instead of just returning the answer, it passes the AI's
actual_outputand the sheet'sexpected_outputto another Evaluation node. - This node uses a second Google Gemini model as a "judge" to evaluate the factual correctness of the AI's answer compared to the expected one, generating a
Correctnessscore on a scale from 1 to 5. - Finally, both the AI's
actual_outputand the automatedcorrectnessscore are written back to a new column in the same row of the Google Sheet.
- The
Set up Steps
To use this workflow, you need to complete the following setup steps:
-
Credentials Configuration:
- Set up the Google Sheets OAuth2 API credentials (named "Google Sheets account"). This allows n8n to read from and write to your Google Sheet.
- Set up the Google Gemini (PaLM) API credentials (named "Google Gemini(PaLM) (Eure)"). This provides the AI language model capabilities for both the agent and the evaluator.
-
Prepare Your Google Sheet:
- The workflow is pre-configured to use a specific Google Sheet. You must clone the provided template sheet (the URL is in the Sticky Note) to your own Google Drive.
- In your cloned sheet, ensure you have at least two columns: one for the input/question (e.g.,
input) and one for the expected correct answer (e.g.,expected_output). You may need to update the node parameters that reference$json.inputand$json.expected_outputto match your column names exactly.
-
Update Document IDs:
- After cloning the sheet, get its new Document ID from its URL and update the
documentIdfield in all three Evaluation nodes ("When fetching a dataset row", "Set output Evaluation", and "Set correctness") to point to your new sheet instead of the original template.
- After cloning the sheet, get its new Document ID from its URL and update the
-
Activate the Workflow:
- Once the credentials and sheet are configured, toggle the workflow to Active. You can then trigger a manual test run or set the "When fetching a dataset row" node to poll your sheet automatically to evaluate all rows.
Need help customizing?
Contact me for consulting and support or add me on Linkedin.
You may also like


New to n8n?
Need help building new n8n workflows? Process automation for you or your company will save you time and money, and it's completely free!


