Generate AI-Powered Competitor Analysis Reports with GPT-4, Apify & Google Docs
Last edited 205 days ago
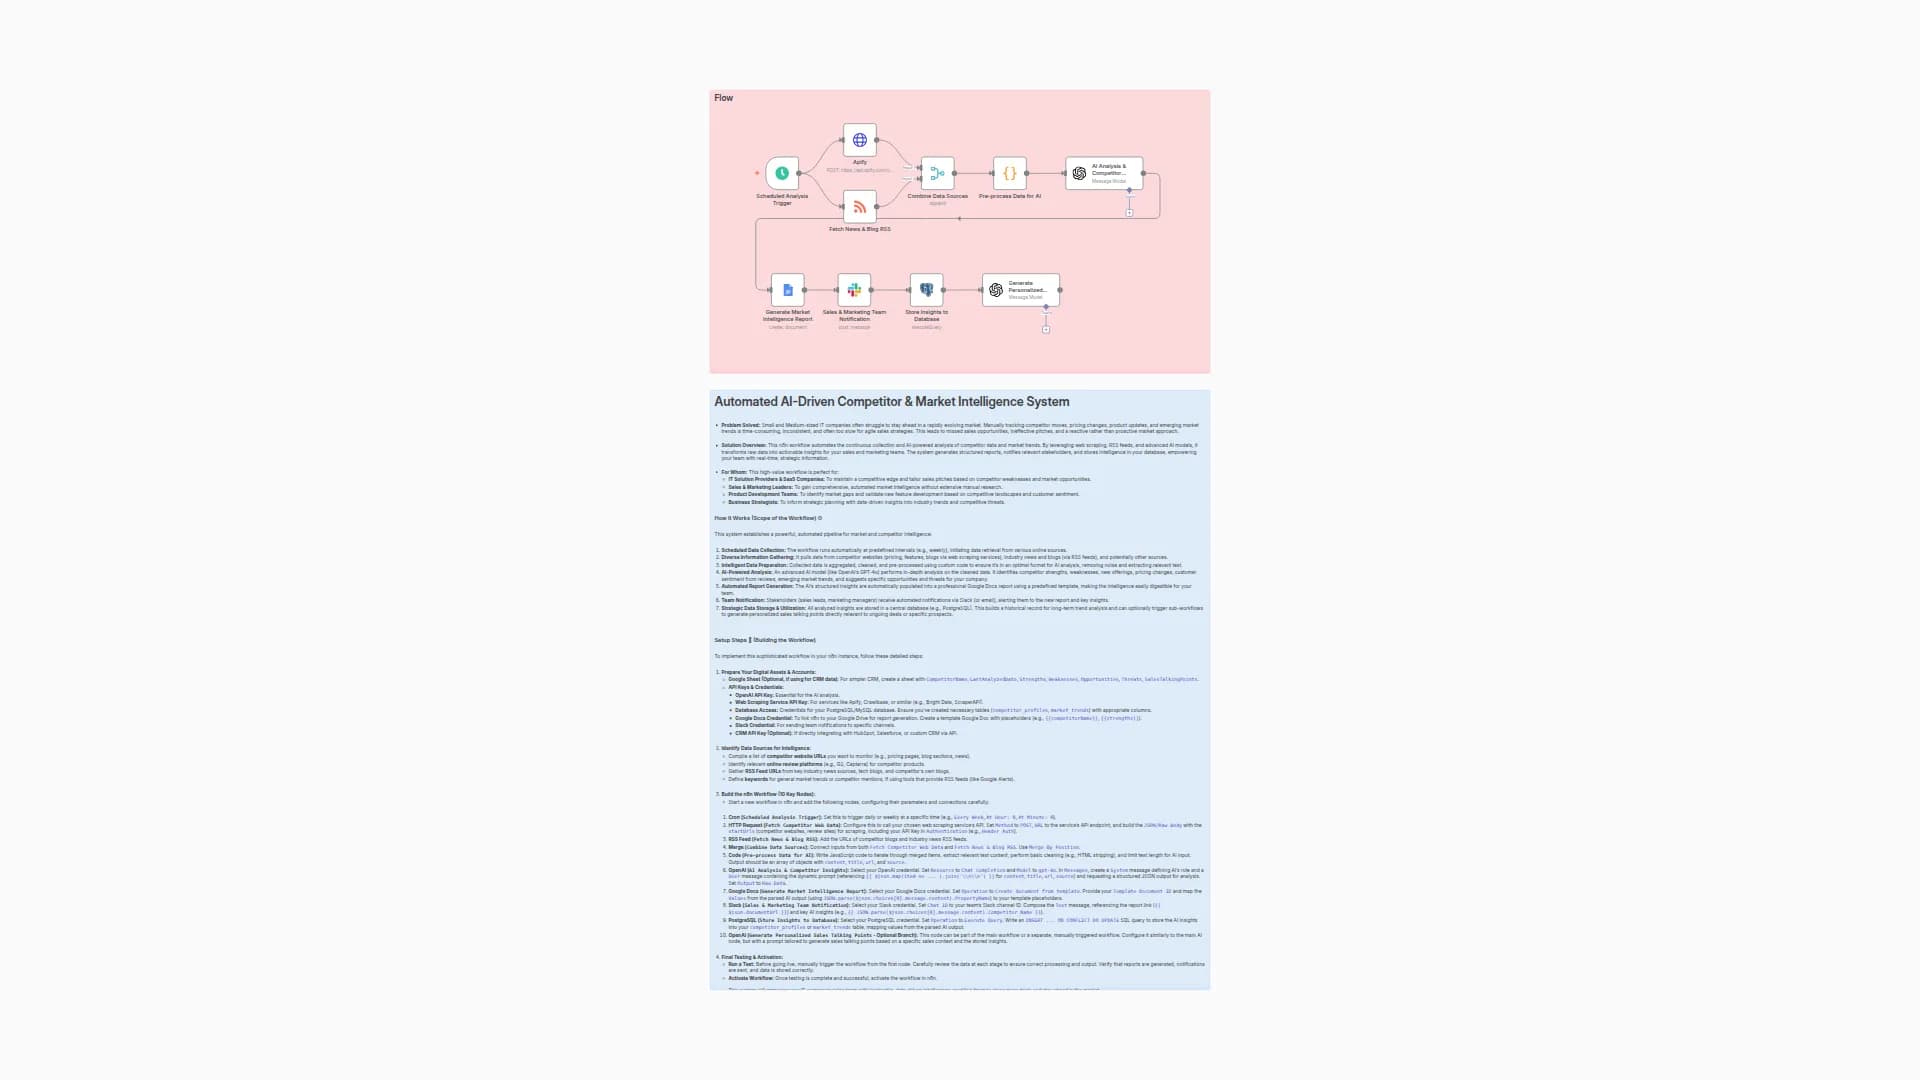
How it Works ⚙️
This workflow is your agency’s secret weapon. It’s a multi-AI-agent system that automates the entire process of competitor and market research, providing you with a complete strategic analysis in minutes.
- Digital Reconnaissance (Agent 1): The workflow is triggered with a client's business name and industry. The first AI agent, powered by Apify, immediately begins a deep dive into the market to identify and scrape data on the client’s top competitors.
- Strategic Analysis (Agent 2): All the raw data from Agent 1 is sent to the second AI agent, powered by OpenAI (GPT-4). This agent performs a sophisticated analysis to summarize competitor messaging, identify their audience, and generate a full SWOT analysis for your client.
- Report & Strategy Generation (Agent 3): A third AI agent, also using OpenAI, takes the strategic analysis and writes a professional, persuasive report. This report is then automatically populated into a pre-designed Google Docs template, ready for review.
- Instant Delivery: The final report is automatically sent to your internal team via Slack, allowing you to start your strategy meeting almost instantly after the workflow is triggered.
Setup Steps 🛠️
-
Get Your Apify Actor:
- Log in to Apify and find a suitable Actor for web scraping (e.g.,
Google Search Results Scraper). - Copy the
Actor IDto use in the n8n workflow.
- Log in to Apify and find a suitable Actor for web scraping (e.g.,
-
Prepare Your Report Template:
- Create a new Google Doc to serve as your report template.
- Use placeholders like
{{ client_name }},{{ report_content }}, and{{ client_industry }}to define where the AI-generated text will go. - Copy the document ID from the Google Doc URL and save it for later.
-
Import the Workflow:
- Copy the provided workflow JSON and import it into your n8n instance.
-
Configure Credentials:
- Apify: Add your Apify API Key.
- OpenAI: Add your OpenAI API Key.
- Google Docs: Add your OAuth2 credential.
- Slack: Add your Bot Token credential.
-
Customize Workflow Nodes:
- Node 2 (
Apify): Paste yourActor IDhere. You can also customize the search queries in theInput JSONto be more specific. - Node 6 (
Google Docs): Paste your template'sDocument IDhere. Ensure theValuesmatch the placeholders you created in your template. - Node 7 (
Slack): Replace[YOUR MARKETING TEAM SLACK CHANNEL ID]with the correct channel ID where you want the report delivered.
- Node 2 (
-
Activate & Test:
- Once all settings are configured, save the workflow.
- Click the "Inactive" toggle to make it live.
- Run a test by manually entering a client's name and industry to ensure the data flows correctly and the report is delivered.
You may also like
New to n8n?
Need help building new n8n workflows? Process automation for you or your company will save you time and money, and it's completely free!


