Automate a Tally Form: Store with Airtable, Notify via Slack
Last edited 206 days ago
🎯 Workflow Goal
Still manually checking form responses in your inbox?
What if every submission landed neatly in Airtable — and you got a clean Slack message instantly?
That’s exactly what this workflow does.
No code, no delay — just a smooth automation to keep your team in the loop:
Tally → Airtable → Slack
Build an automated flow that:
- receives Tally form submissions,
- cleans up the data into usable fields,
- stores the results in Airtable,
- and automatically notifies a Slack channel.
Step 1 – Connect Tally to n8n
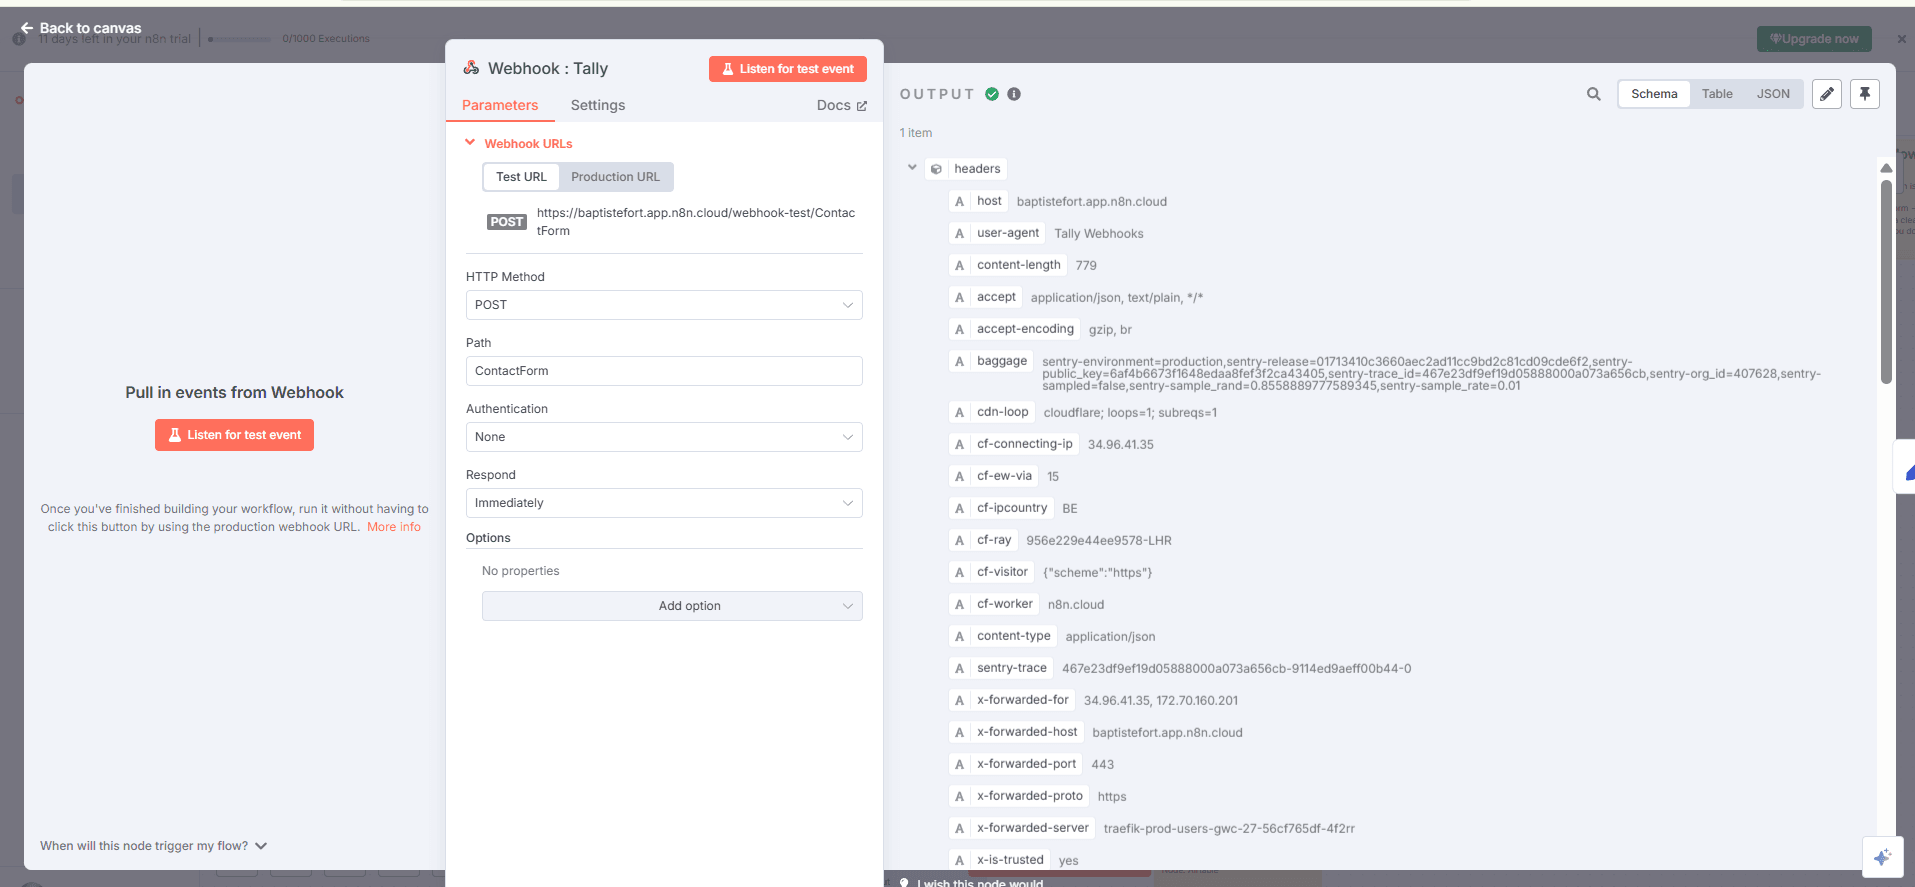
What we’re setting up
A Webhook node in POST mode.
Technical
- Add a Webhook node.
- Set it to POST.
- Copy the generated URL.
- In Tally → Integrations → Webhooks → paste this URL.
- Submit a test response on your form to capture a sample structure.
Step 2 – Clean the data
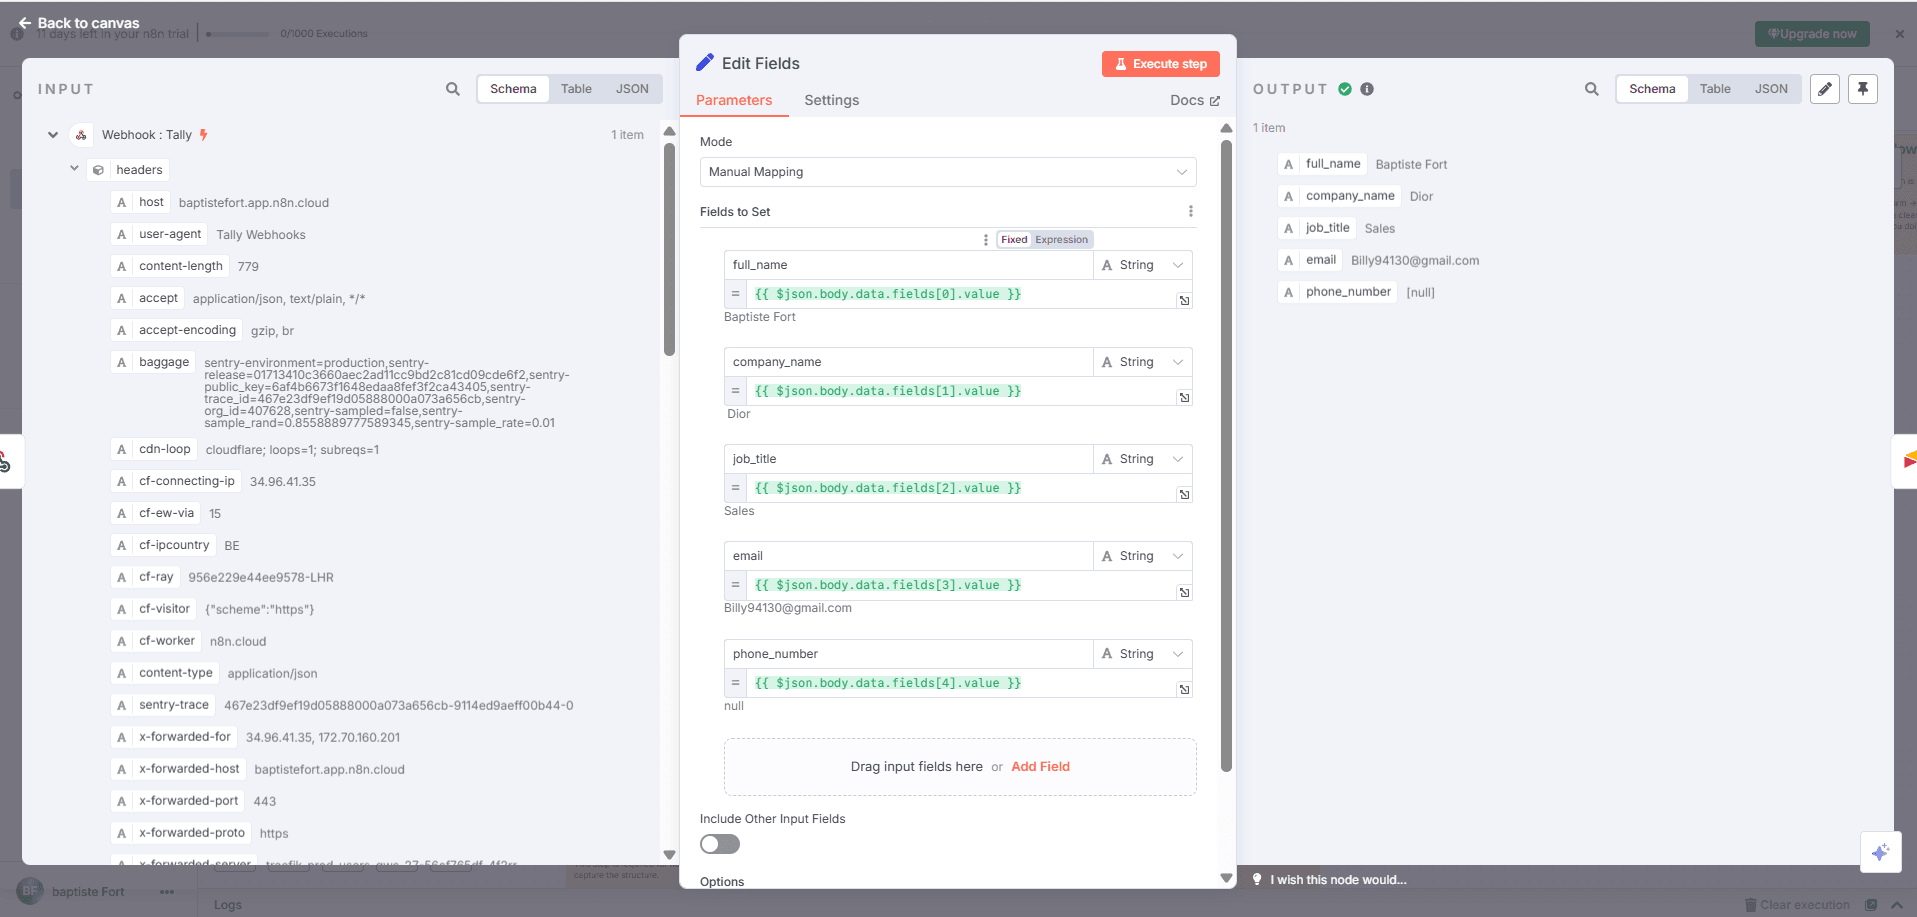
After connecting Tally, you now receive raw data inside a fields[] array.
Let’s convert that into something clean and structured.
Goal
Extract key info like Full Name, Email, Phone, etc. into simple keys.
What we’re doing
Add a Set node to remap and clean the fields.
Technical
- Add a Set node right after the Webhook.
- Add new values (String type) manually:
- Name: Full Name → Value: {{$json["fields"][0]["value"]}}
- Name: Email → Value: {{$json["fields"][1]["value"]}}
- Name: Phone → Value: {{$json["fields"][2]["value"]}}
(Adapt the indexes based on your form structure.)
Use the data preview in the Webhook node to check the correct order.
Output
You now get clean data like:
{ "Full Name": "Jane Doe",
"Email": "[email protected]",
"Phone": "+123456789" }
Step 3 – Send to Airtable

✅ Once the data is cleaned, let’s store it in Airtable automatically.
Goal
Create one new Airtable row for each form submission.
What we’re setting up
An Airtable – Create Record node.
Technical
- Add an Airtable node.
- Authenticate or connect your API token.
- Choose the base and table.
- Map the fields:
- Name: {{$json["Full Name"]}}
- Email: {{$json["Email"]}}
- Phone: {{$json["Phone"]}}
Output
Each submission creates a clean new row in your Airtable table.
Step 4 – Add a delay

⌛ After saving to Airtable, it’s a good idea to insert a short pause — this prevents actions like Slack messages from stacking too fast.
Goal
Wait a few seconds before sending a Slack notification.
What we’re setting up
A Wait node for X seconds.
✅ Technical
- Add a Wait node.
- Choose Wait for X minutes.
Step 5 – Send a message to Slack
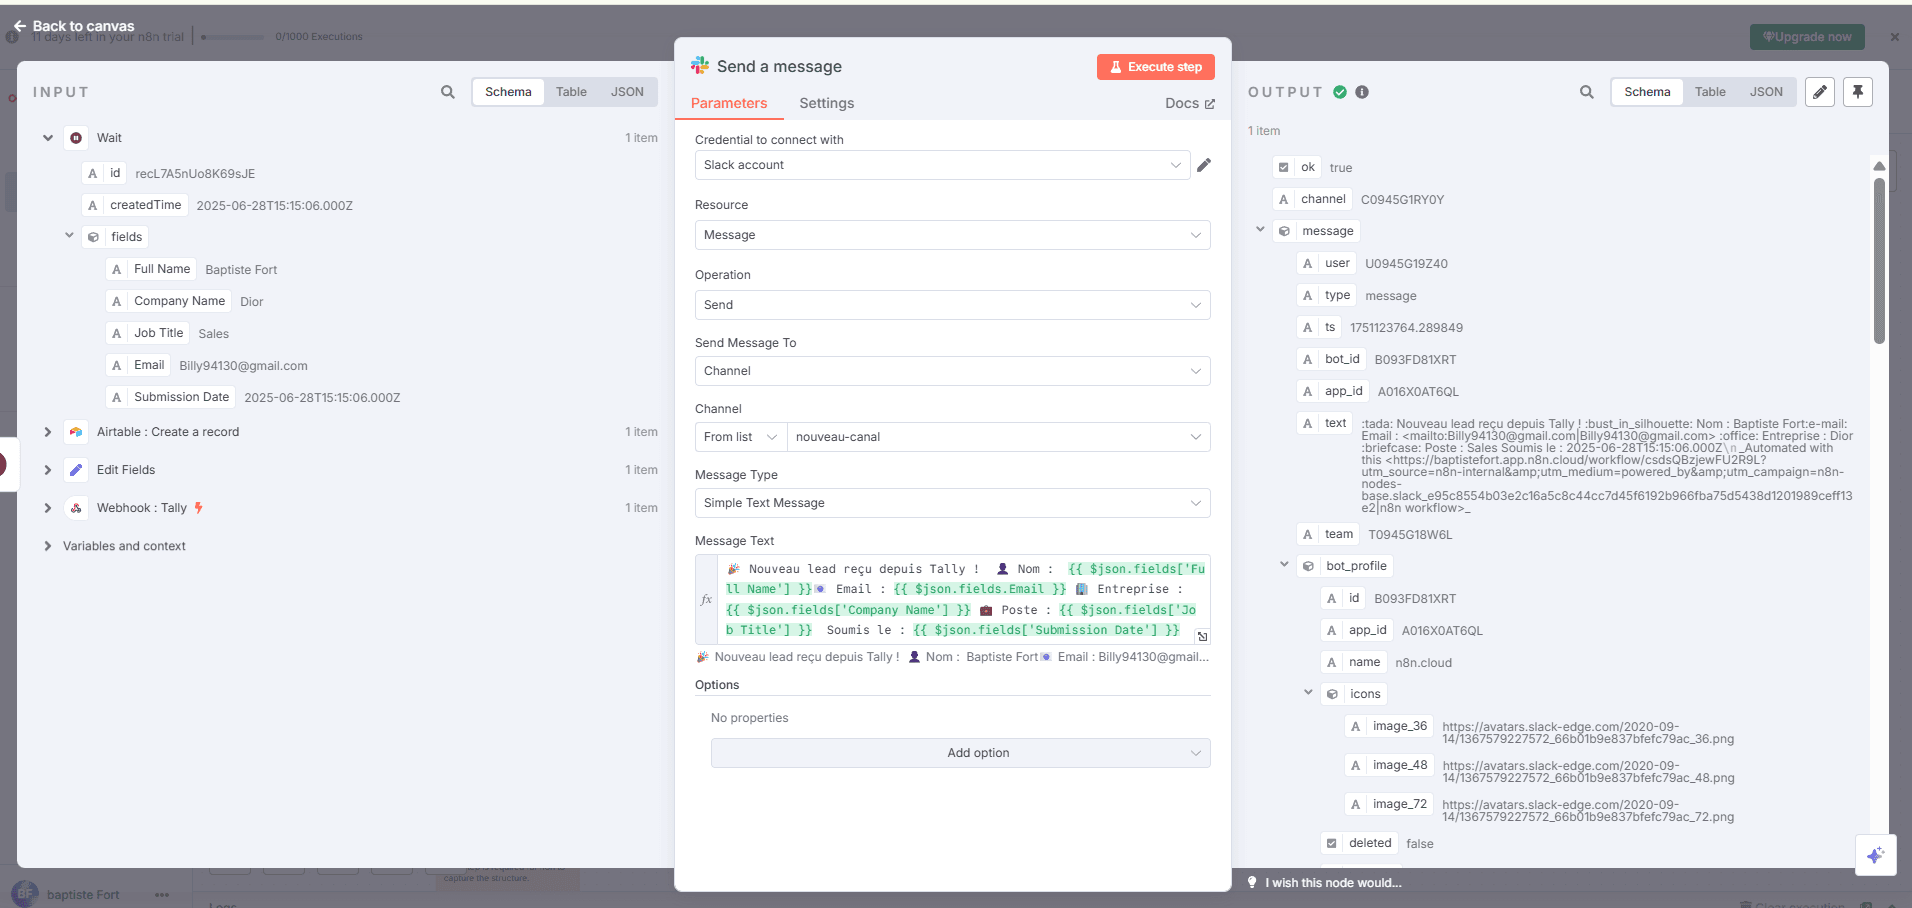
💬 Now that the record is stored, let’s send a Slack message to notify your team.
Goal
Automatically alert your team in Slack when someone fills the form.
What we’re setting up
A Slack – Send Message node.
Technical
- Add a Slack node.
- Connect your account.
- Choose the target channel, like #leads.
- Use this message format:
New lead received!
Name: {{$json["Full Name"]}}
Email: {{$json["Email"]}}
Phone: {{$json["Phone"]}}
Output
Your Slack team is notified instantly, with all lead info in one clean message.
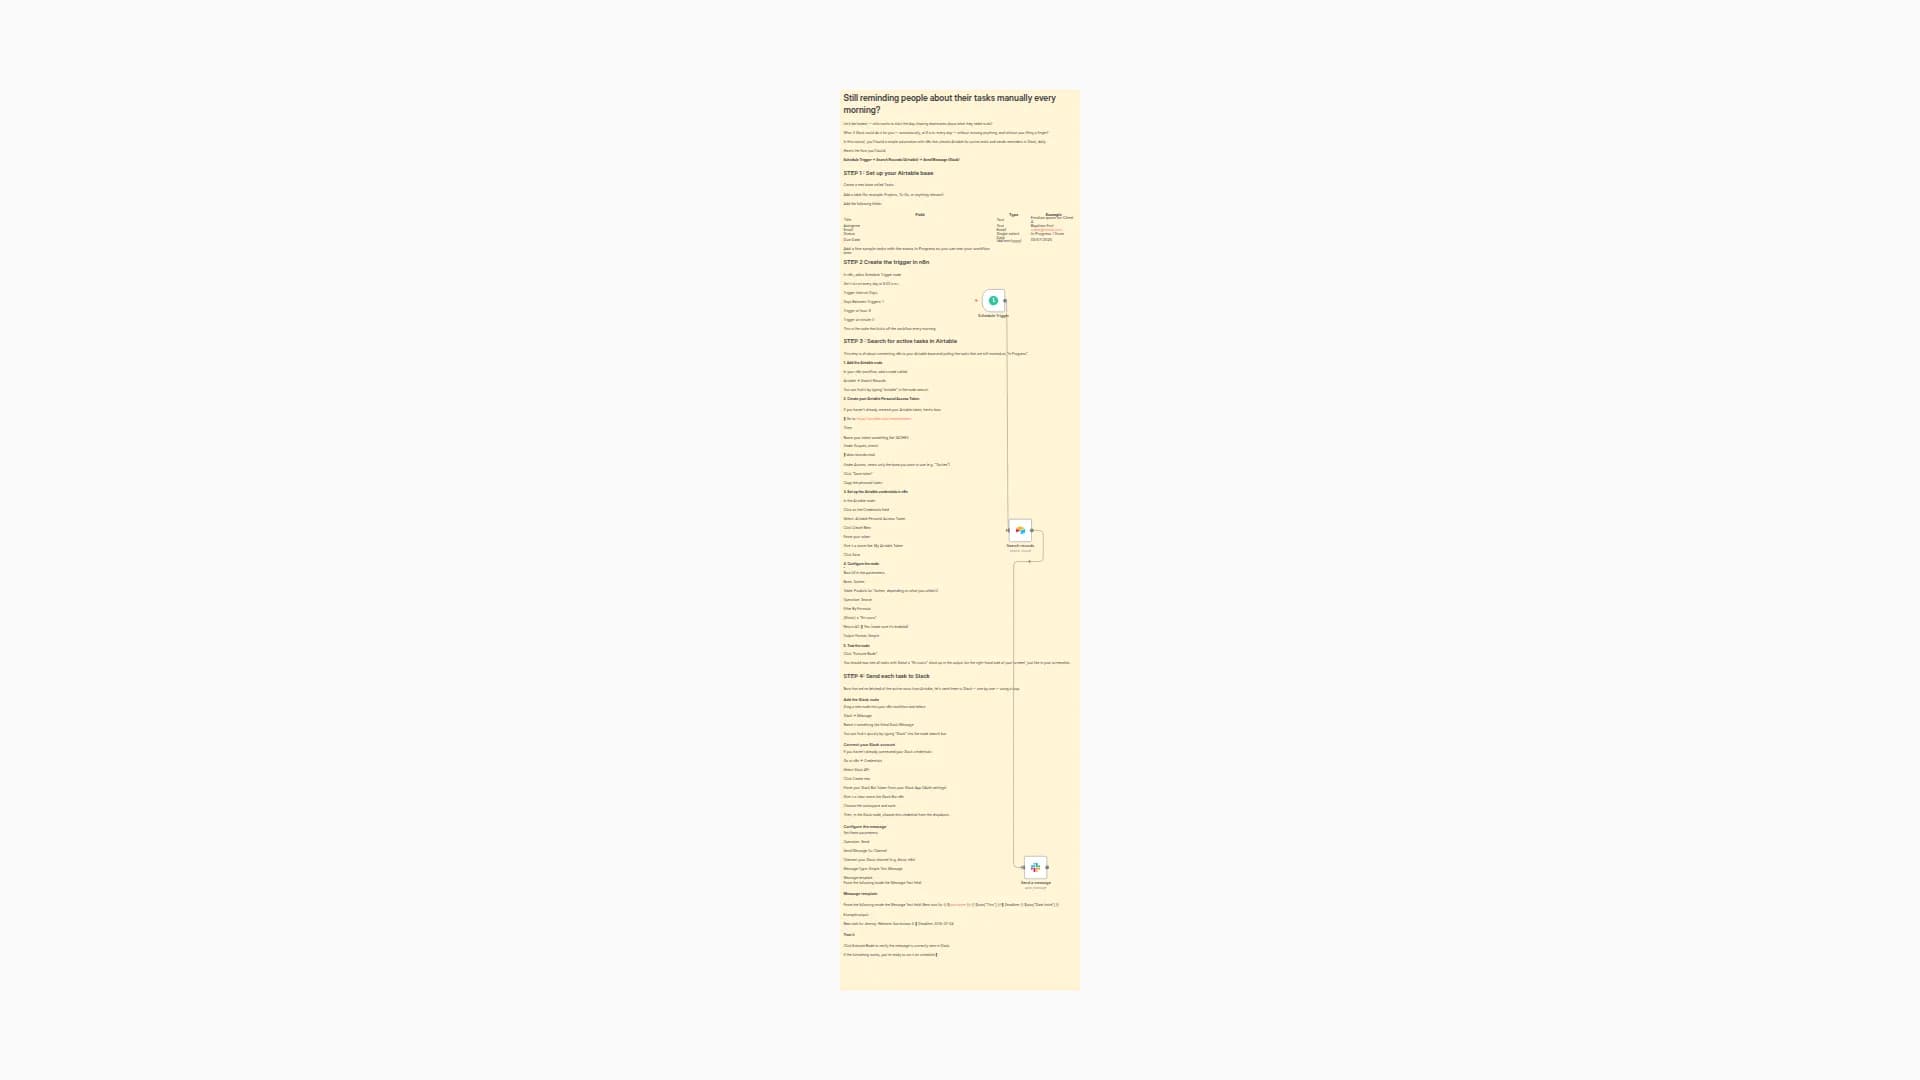
Workflow Complete
Your automation now looks like this:
Tally → Clean → Airtable → Wait → Slack
Every submission turns into clean data, gets saved in Airtable, and alerts your team on Slack — fully automated, no extra work.
Looking for professional automation support? Try 0vni – Agence automatisation.
You may also like

New to n8n?
Need help building new n8n workflows? Process automation for you or your company will save you time and money, and it's completely free!


